How to install Joomla!
To help you get your Joomla! site going we’ve put together a quick step-by-step guide on how to install Joomla! on sgis.co.uk using our install script.
Step 1
You need to ensure that the directory you want to install Joomla! to is empty. For example if you want to install to the root directory you will need to delete the default index.html file which is created automatically when your hosting package is set-up.
You also need to ensure that you have a free SQL database as Joomla! requires the use of 1 SQL database.
Step 2
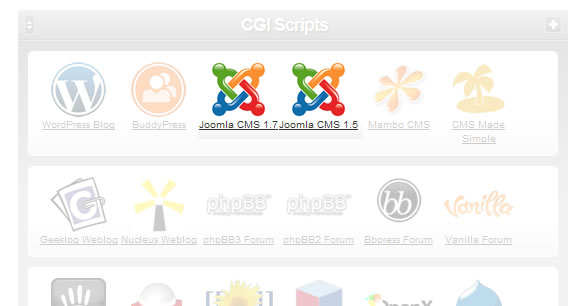
Visit the script area on SGIS’s hosting control panel and click on the Joomla! installation required.

Step 3
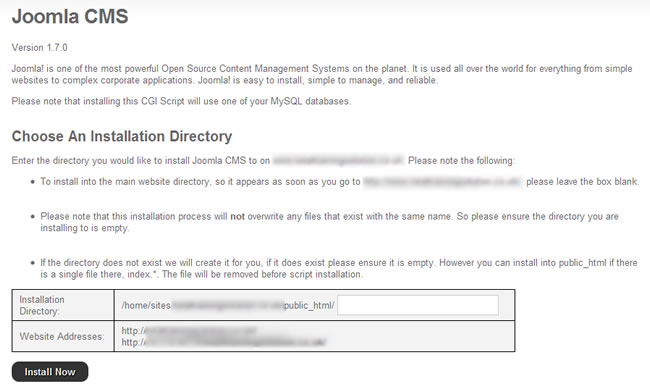
This is where you choose what directory you want Joomla! to be installed to. If you want to install it to the root directory simply leave the field blank. Once you’ve picked the directory for Joomla! to be installed to click “Install now”

Step 4
Once the installation has completed you will the below screen. You are given to links to set-up Joomal!, the top link goes to the live site and the second goes to a temporary address. You only need to use a temporary address if your site isn’t live, for example if your domain is still pointing to another server or it is pending a transfer. For most users you will need to click on the top link to start the set-up.

Step 5
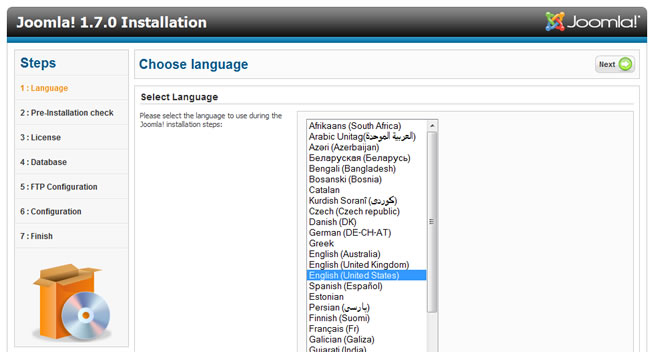
After clicking on the relevant link you will be taken to the Joomla! installation page where you are required to take 7 steps to complete the installation.

Step 1: Language
Pick your language
Step 2: Pre-Installation check
This is checking the installation so far is OK. As we’re using the install script this has done the hard work for you and everything should be ready to go.
Step 3: License
This outlines the use of Joomla! under the GNU General Public License.
Step 4: Database
Again as we’re using the install script there is nothing to do here.
Step 5: FTP Configuration
You have the option to set-up FTP if you want. You can find FTP details on the right hand sidebar on SGIS’s hosting control panel.
Step 6: Configuration
Nearly there, just need to pick a site name, username and password. You also have the option to install sample data to your site if you want information straight away.
Step 7: Finished
You first need to delete the installation files for security and then you can either visit the site or the admin pages to customise Joomla!
You are now ready to start working on your Joomla! site. If you need further advice on installing Joomla! please contact support.. For more information on Joomla! please visit joomla.org
